The recipe I offer you today is tried and true and has never failed me. It hails from my Dixie Delights cookbook, published in 1983 by the St. Francis Hospital Auxiliary in Memphis, Tennessee, a gift from my mother after a visit to my sister when she lived there in 1984. This cookbook has been around the block a few times and is one of my go-to-sources for good Southern sweets and desserts. The red velvet cake is a perfect example of why I use this cookbook so consistently. The layers bake marvelously flat, are easily released from the pans after only slight cooling and frost beautifully. I can pretty much guarantee you a cake that is a double threat--baked up with both great taste and festive presentation. I sacrificed much this weekend to bake a cake for the sole purpose of photographing the process. I guess now we'll just have to consume this one quickly so I can bake a fresh one for Christmas Day! Somehow as I cut into the cake just a few hours ago, it didn't feel like much of a sacrifice. It felt rather as if the Christmas season had arrived!
Red Velvet Cake
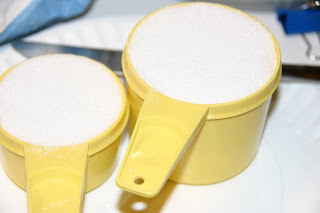
1-1/2 cups sugar
2 cups oil
2 eggs
1 teaspoon soda
1 teaspoon salt
1 teaspoon vinegar
1 tablespoon cocoa
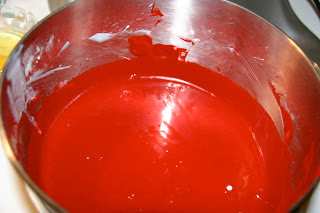
2 ounces food coloring
1 tablespoon vanilla
2-1/2 cups sifted flour
1 cup buttermilk
1. Preheat the oven to 350 degrees. (I use an oven thermometer to check my temperature. My oven is 25 degrees hotter than the setting. That much variation can effect your results.)
2. Cut wax paper to fit three 9 inch cake pans. Grease the pans with a bit of oil or cooking spray and place the wax paper on the bottom of each pan.
3. Cream sugar and oil together with a hand mixer or in a stand mixer.
4. Add eggs one at a time, beating after each addition.
6. Add the flour and buttermilk alternately in several additions, beginning and ending with the flour.
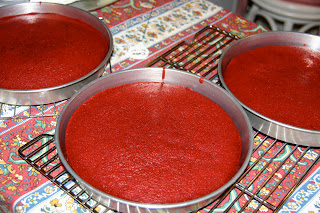
7. Divide the batter evenly among the pans.
8. Bake about twenty minutes until a tester inserted into the middle of the layer comes out clean. Note that the layers may not all finish at the same time. When I baked this cake, two layers finished at the same time and the other required another couple of minutes.
9. Cool slightly on a rack.
10. Flip layers out of the pans, remove the wax paper and allow to cool completely before frosting with cream cheese frosting. A note about this stage of cooling: nudge the layers around on the rack from time to time while cooling. Sometimes the rack will imbed itself in the cake and you'll end up with crumbs when the layer pulls away from the rack. A gentle nudge to change the layer's position will help with this.
Cream Cheese Frosting
8 ounces cream cheese
1 stick or 1/2 cup butter
1 pound confectioner's sugar
1 tablespoon vanilla
1. Allow cream cheese and butter to soften to room temperature. Mix together.
2. Add sugar a little at a time until blended into cream cheese mixture.
3. Add vanilla and mix well.
Frosting tip: Don't scrimp on frosting between layers and use an offset spatula to spread frosting from the middle out. You don't want to pick up red crumbs and mix in with the frosting. If this should happen, stay cool! We can fix this! Finish frosting the entire cake. Hold back a little of your frosting and leave it at room temperature. Refrigerate the frosted cake. When it has cooled and the frosting is set, take the cake out and spread the reserved frosting over the places where the crumbs got mixed in. Voila! No one will ever know.
Tips on making cupcakes: This recipe will make about 21-24 cupcakes, depending upon how much you fill the cups. Use cupcake liners and fill a generous 3/4 of the way. The baking time will be about the same as for the layers, 20 minutes at 350 degrees.
About red food coloring: This stuff will stain so be careful. One year I popped open a bottle of the food coloring with too much vigor and it spilled all over me and down the front of my white cabinets. I had to use bleach to clean the cabinets and the Nike swoosh on my black warm up pants is red to this day.


No comments:
Post a Comment