Friday, December 17, 2010

Cold Nights

Unfortunately, I lost November.  For that matter, the first two weeks of December sprinted by as well, leaving me with my mouth agape wondering where time has gone.  Can you misplace 6 weeks?  I may sound as if I haven't been fully present, as if I have been holed up in a cave or otherwise dubiously preoccupied--but that would be an overstatement.  In fact this month and a half has just been so jam-packed I have tended to let non essentials slide.

November and December actually looked like this:  My road warrior husband graciously allowed me to tag along with him on business trips to the Georgia coast.  I road-tripped to numerous Auburn football games including the arctic blast that was this year's Iron Bowl and the exhilaration of the SEC championship game.  I spent time in Atlanta with family for Thanksgiving.  I brought my mom back to Fairhope (by way of Jekyll Island) for a week spent sipping warm beverages and hoping Paul didn't notice we were slowly inching the thermostat higher and higher.

When last I checked it was the transitional season I love most, autumn (unless you ask me in March or April and then my favorite is definitely spring.)  But then I blinked and we were slap dab in the middle of what I would swear is winter.  I would never thrive in a really wintry climate.  When the mercury creeps down toward the freezing point, I pull out the gloves and scarves and my pillowy winter coat.  I connect the heated mattress pad and fire up a strategically placed space heater.  Paul survives in the steamy microclimate I create by stripping down to his scivvies and stepping outside periodically to breath.

But the good thing about cold weather is the opportunity it presents  to cook cold weather food.  Oh yes, just as surely as we put away our white shoes and patent leather after Labor Day and pull out our corduroy and woolens, there are some foods that can ONLY be enjoyed after the leaves have turned and the air has a decided chill.  Would you eat a steaming bowl of chili in late July?  Absolutely not!  Likewise, a hearty stick-to-your-ribs meal of braised short ribs is something I tend to gravitate toward as the days have gotten shorter and sweaters and turtle necks begin to make a regular appearance.

This recipe for braised short ribs is now one of my favorite ways to eat beef.  Although not nearly as simple to prepare as throwing a steak on the grill, a meal cooked in a big pot in a slow oven has its own charms.  The aroma drifting through your house if leaked beyond your walls may just bring a casual passerby inside to see if you would be willing to set another place at the table.  It is so versatile it can be served peasant style with a rustic baguette and a simple salad or it can be dressed up with some creamy polenta and roasted vegetables.  When all gussied up it becomes a great do-ahead meal for guests.  And again, when you open the door to invite folks inside, they will feel oh-so welcome and may well never leave.  Last February I put short ribs in the oven while we walked up the street for a Mardi Gras parade.  When we came home, the house smelled like heaven and dinner was ready.  You can't really beat that on a cold winter night!

Braised Short Ribs
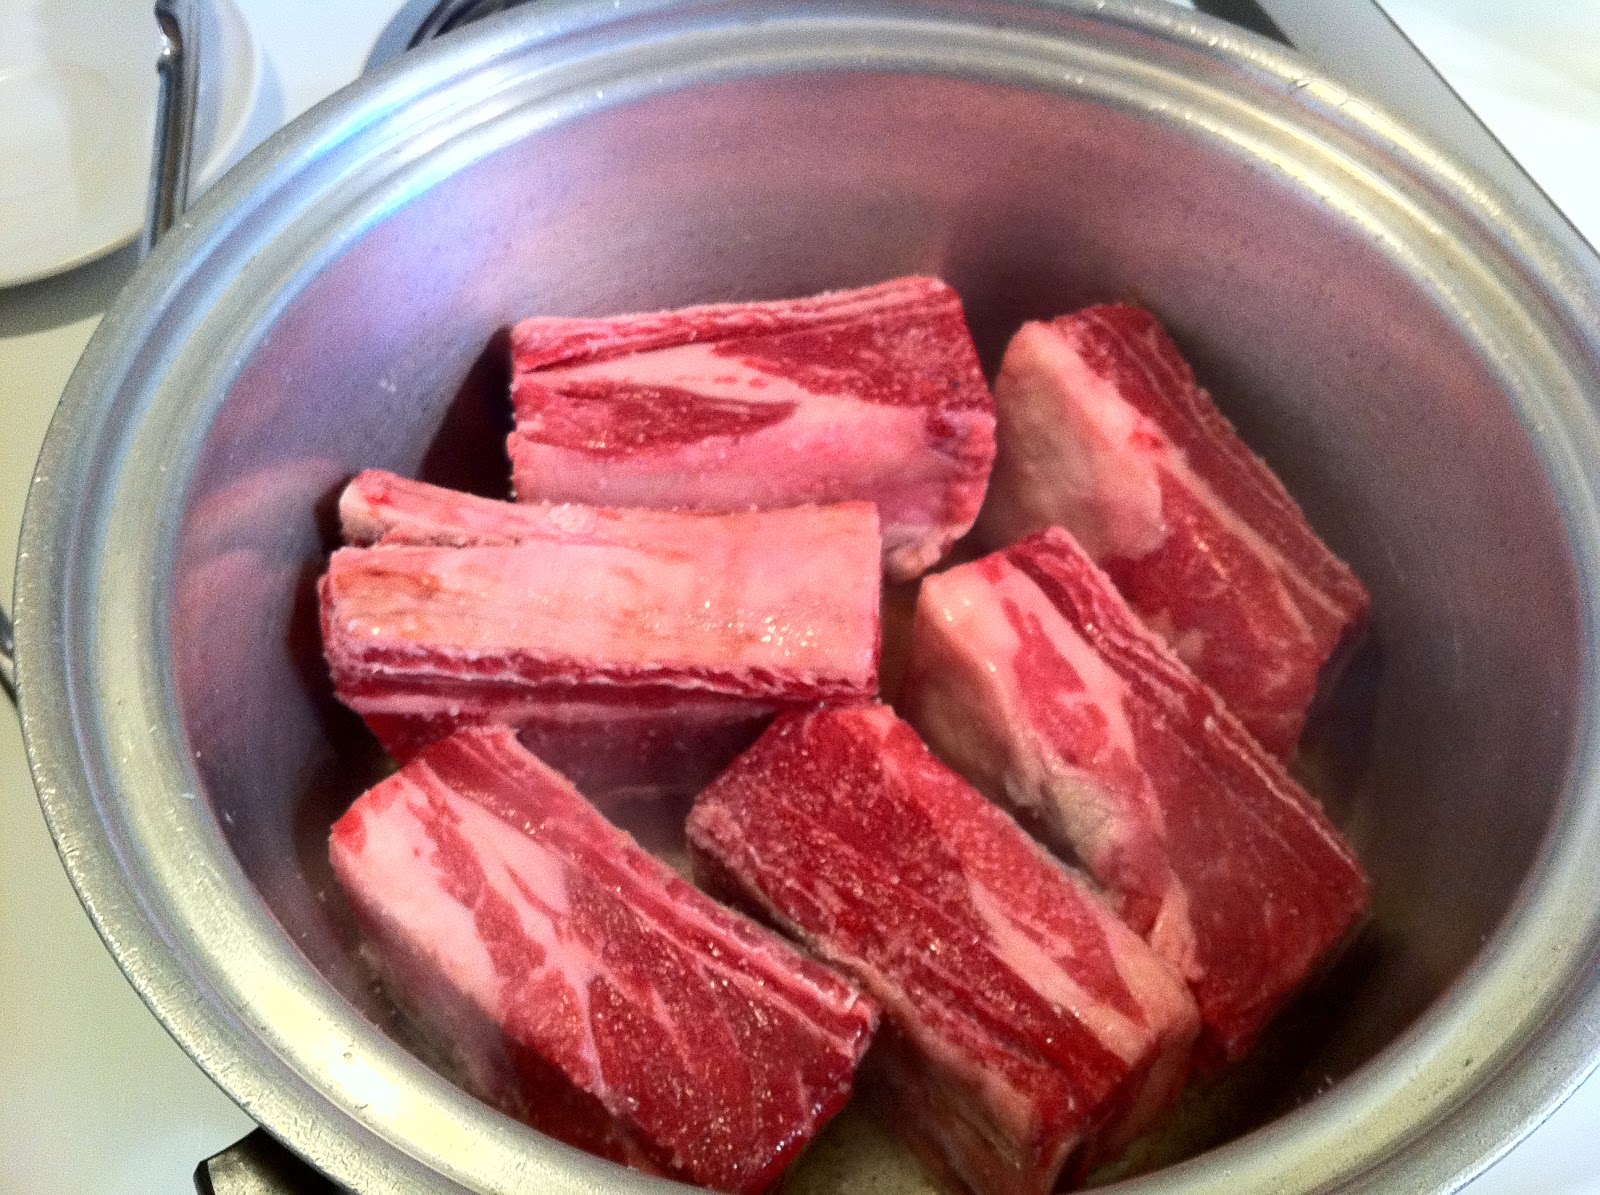
6 or so bone-in short ribs, about 6 pounds
kosher salt
extra virgin olive oil
2 cloves garlic
2 ribs celery
2 carrots
1 large onion
2 6-ounce cans tomato paste
1 bottle red wine (the kind you would drink)
1-2 cups water
1 bunch fresh thyme, tied with kitchen string
2 bay leaves


1.  Preheat the oven to 375 degrees.

2.  Pull out your big dutch oven for this.  Coat the pan with olive oil and bring to high heat.  Season the ribs generously with salt and pepper and brown on all sides. Don't overcrowd the pan or you won't get a nice sear on each side.  You may want to work in batches.

3.  While the ribs are browning, cut the vegetables in chunks and smash the garlic.  Process together in a food processor until it forms a coarse paste.

4.  Remove the ribs from the pan and add more olive oil to the same pan.  Add the pureed vegetables.  Season generously with salt.  Allow the vegetables to brown until they are dark and crusty on the bottom, but not burned.  Continue to turn and allow to become crusty again several times.  This will take about 7-10 minutes.  Mix in the tomato paste and allow the mixture to brown again, about 5 minutes.  Add the wine and scrape the pan.  Lower the heat and reduce the mixture by about half.

5.  Return the short ribs to the pan and add water until the ribs are covered. Add the thyme bundle and the bay leaves.  Cover the pan and place in the preheated oven for about 3 hours.  Check periodically during the process and add more water, if needed.  Turn the ribs over halfway through the cooking time.

6.  Remove the lid during the last 20 minutes of cooking to let the ribs get nice and brown and to allow the sauce to reduce.  When done the meat should be quite tender but not falling off the bone. (Although much worse things could happen!)

7.  Serve with the braising liquid.  These could be served with mashed potatoes or pasta. A nice creamy polenta with a little cheese added is probably my favorite, especially when the polenta and the sauce get really chummy with each other!

Saturday, October 30, 2010

Mellow Mornings

Not every morning can be mellow.  The rapid-fire pace of life demands that most days' nourishment (and I use that term lightly) begins with something perfunctory, scarfed from a package or slurped quickly from a bowl. I am of the opinion that a good breakfast, the kind you share with others on a weekend or holiday, presents some of life's finest moments.  The breakfast table is one of my happy places!

I grew up with leisurely Saturday morning breakfasts, catered mid-morning to a houseful of late sleepers.   My mom to this day makes magic biscuits and has this skillet wonder dish she calls German Farmer's Breakfast, a melange of potatoes, onions, peppers and whatever scrambled into eggs in a sort of loose frittata.  And she can take an earnest package of dried beef and turn it into a gravy that is to die for.  Really!  But more important has been the time around the table, the connecting, the catching up, the idle conversation over cleaned plates that makes the morning happy.  The food, ah the food, is a most lovely catalyst that calls folks to lounge and linger.  Many weekends as I was growing up, the Lambert house resembled a loud and happy boarding house or gregarious bed and breakfast as relatives and friends found an extra bed or pull-out sofa at the ready on Friday nights, and groggily found their way to the kitchen table as the smell of hot biscuits and fresh-brewed coffee began to nudge them gently to wakefulness on Saturday morning.

This is a tradition I felt obliged to carry over to my own family.  When I married Paul and the boys, I found breakfast to be the one meal where I could please everyone's palate. I was a novice at feeding young boys and I cooked a lot things that missed the mark.  I could tell by the ring of detritus around the edge of the plates as I cleaned the dishes, little pieces of mushroom or onion or celery or other ingredients deemed either unidentifiable or undesirable by discerning boys.  Pancakes worked 100% of the time. Bacon was always a hit. I hope now as they are older they understand food is one of the ways I have tried to show them love over the years, even though some of the attempts were questionable!

As Paul and I have become empty nesters, sharing a leisurely Saturday breakfast continues to be something we gravitate toward, a cozy respite after scattered days and schedules.  And given the chance when visiting friends' homes I will volunteer to make breakfast as a sort of reverse gift of hospitality (they supply their home, I love them with breakfast!)

We have lovely friends who have allowed us to make ourselves at home at their lake house for Auburn football weekends.  They share so generously of their home and their friendship.  Last weekend as we settled in with them on Friday night in preparation for an epic Auburn football battle with LSU, I came prepared with Saturday breakfast. Likewise, as the holidays are fast approaching (oh, yes, faster than we can imagine) many of us will be opening our homes to friends and relatives or finding ourselves camped out on extra beds and pull-out sofas as we become the guests.  Nothing says love like yeasty homemade cinnamon rolls.  The smell announces good tidings way before the first roll is shared.  With just a little bit of advance preparation (okay, maybe a MODERATE amount of advance preparation) you can create an environment where lounging and lingering are de rigueur.

Once again my faithful recipe hound (husband Paul) found this recipe for me and it's been tucked away in a folder awaiting the right opportunity.  Clipped from the Atlanta Journal Constitution who-knows-when, this recipe teased us with a picture of a baking sheet crammed full of cinnamon rolls the size of baseball mitts--think catcher's glove size!  I have experimented with the recipe and made all the mistakes FOR you ahead of time here in my humble test kitchen and can guide you step by step through what you need to know to prepare these and freeze them in advance.  And if you are a newbie to yeast breads I encourage you to be of good cheer and overcome your fear.  Yeast doughs are amazingly resilient and forgiving.  It is not nearly as easy to mess up as you may think.  And nothing is quite as therapeutic and cathartic as having your hands in dough.  Give this recipe a try and a lovely mellow morning is sure to follow.

GIANT CINNAMON ROLLS
Adapted from a recipe provided by Deb Rapp to the AJC food section.  I halved the original recipe and made 12 rolls.  You can double this for a big batch that makes two dozen.


Dough:
1 package yeast (or 2-1/4 tsp.)
1/2 cup plus 1 TB. sugar, divided
3/4 cup warm water, divided
1/4 cup (1/2 stick) butter, room temperature
1/2 cup milk
1 egg
1 tsp. salt
3 to 3-1/2 cups bread flour
1 cup whole wheat flour (optional, you may use all bread flour)

Filling:
3/4 cup packed light brown sugar
1/4 cup all purpose flour
2 TBS. cinnamon
1/2 cup (1 stick) butter, room temperature

Frosting:
1 cup confectioners' sugar
3 oz. cream cheese, room temperature
1/4 cup (1/2 stick) butter, room temperature
1 TBS. milk
1 tsp. vanilla

To make the dough:
1.  Dissolve yeast and 1 TBS. sugar in 1/4 cup warm water.
2.  Mix together the flours.
3.  Place 1/4 cup butter and 1/2 cup sugar in a large bowl, or in the bowl of a stand mixer.  Scald milk and pour over the butter and sugar.  Stir by hand or on low speed with a dough hook until butter is melted and sugar dissolved.
4.  Stir in remaining 1/2 cup water, the yeast mixture, the egg and salt.
5.  Stir in 3 cups of the flour mixture until combined.
6.  Gradually add in the remaining flour a little at a time until dough holds together and loses some of its stickiness.
7.  Turn out onto a floured surface and knead in more bread flour as necessary until smooth and elastic.
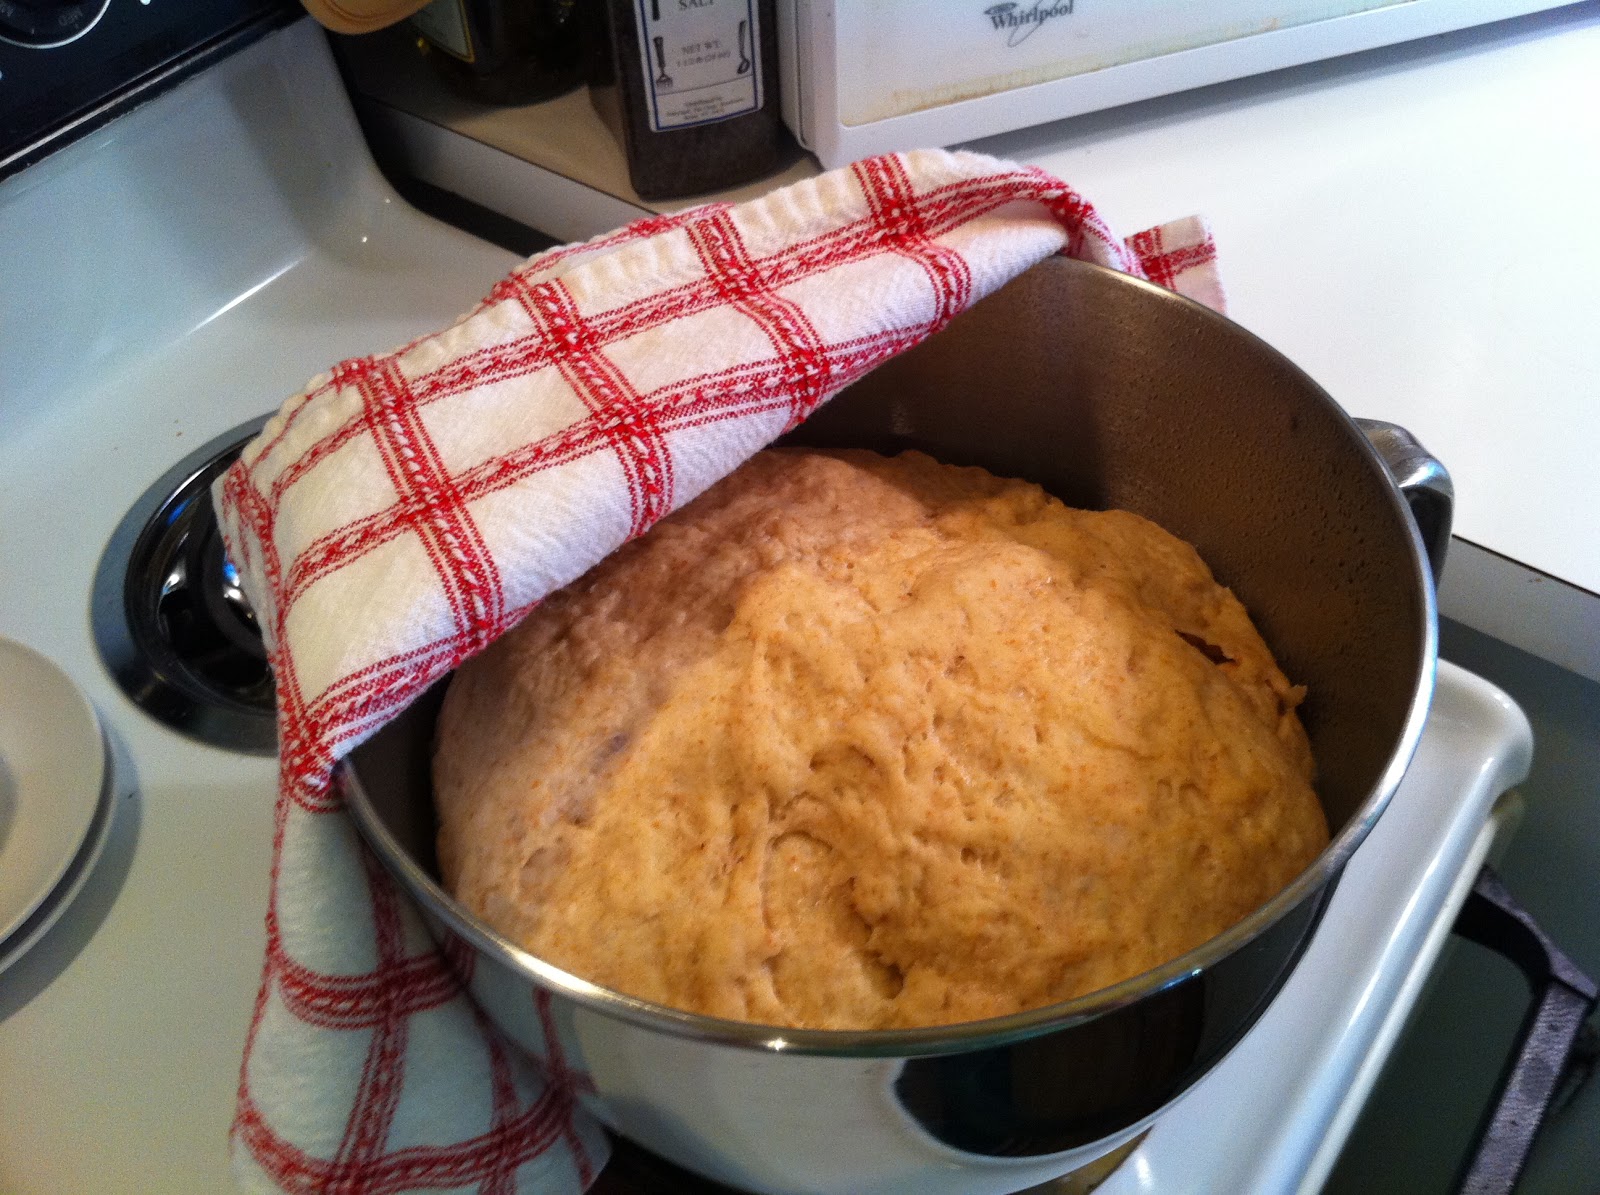
8.  Place in a greased or buttered bowl and cover with a damp towel or plastic wrap.  Let rise in a warm place until doubled, about 2 hours.
To make the filling:
1.  In a medium bowl, mix together the brown sugar, flour and cinnamon.
2.  Stir in the butter. (I use a fork.)  The sugar mixture will be the consistency of frosting.

Assembling the rolls and preparing for baking:
1.  Turn out the risen dough onto a smooth floured surface and pat or roll into a large rectangle, about 12 X 22 inches using more flour as necessary to keep dough from sticking.
2.  Using a flat blade or offset spatula, spread the dough with the cinnamon mixture.
3.  Cut into 12 1-inch wide strips starting at the narrow end.
4.  Starting at one end of the strip, roll up, tucking the end underneath the roll.  Try to avoid stretching the dough as you roll.  You don't want to make the roll too tight, because it still has some rising to do.
Note:  If you intend to freeze the rolls, at this point place the rolls on a baking sheet covered in parchment or wax paper so that the rolls do not touch each other. Place in the freezer uncovered until frozen solid.  When completely frozen, rolls may be placed in a plastic container on layers of wax paper.   For traveling, I packed the plastic container in a cooler and covered completely with ice. The rolls were still partially frozen after 7 hours of traveling.  They can go back into the freezer at your destination or onto a baking sheet in the refrigerator for cooking the next morning as per the note in step five.   If rolls are to be cooked immediately and not frozen, proceed to step five.

5.  Place rolls 2 inches apart on a baking sheet sprayed with cooking spray.  Cover and let rise for 30 minutes to an hour.

Note:  If rolls are frozen, take from the freezer the night before you intend to cook. Place rolls on a baking sheet covered in cooking spray.  Cover lightly with plastic wrap and place in the refrigerator over night.  The next morning, take the rolls out of the refrigerator a couple of hours before you intend to bake.  Place them in a warm place, not on a cold granite or marble counter top.  I placed the baking sheet on top of a 9 X 12 glass baking dish filled with warm water.  When ready to bake, proceed with step six.
  
6.  Preheat oven to 350 degrees.  Bake rolls until lightly browned, 15-18 minutes. Remove from oven.
To make the frosting:
Mix together the cream cheese, butter, sugar, milk and vanilla until smooth.  Can be mixed ahead of time and refrigerated until needed.  When the rolls come out of the oven, cool slightly and put a large spoonful of frosting on each roll.  Come back with a knife or spatula and smooth the frosting around the top of the roll.  Can be served warm or at room temperature, but warm is certainly a tad more desirable!

Wednesday, October 20, 2010

We Watched a Sunset - and Then Ate Meatballs

Sometimes I start to take sunsets for granted, and living just steps from Mobile Bay, I have no excuse.  God shows up whether I do or not, and every night something magical happens when the sun slips out of sight on the horizon.  From the western exposure of my kitchen window, I get a sneak peek at what God has in store about one half hour before the main event.  I am usually in the kitchen that time of day either putting the finishing touches on supper, or if my culinary time management is operating per usual, just starting to pull together the evening meal.  These days I generally acknowledge the approaching sunset with a smile and nod to God as I see the sun begin to sink over the tree line.  When we first moved here, we planned our evening AROUND the sunset and rarely missed one.  But then we began to get complacent, doing what people do, telling ourselves there will be another opportunity tomorrow.

Seems to me I do the same thing with relationships every time I fail to make them a priority.  It is so easy to get caught up in the tyranny of the urgent--or so we tell ourselves.  How urgent are the things that distract us?  How much juggling does it really take to make time for the people we love, to tell someone we care, to watch a sunset with the person we love the most?

Really, not so much time at all.  Last Sunday night was typical and I was scurrying around trying to get supper on the table.  Out of the corner of my eye, I began to catch a glimpse of something splendid working its way toward the horizon.  Then I remembered.  I remembered to stop.  I remembered how good it feels to notice.  I took stock of things in the kitchen and found a way to put everything on hold, announcing to Paul we had an appointment to keep down by the bay.  The meatballs would wait!

We watched a sunset.  We sat together on the bluff watching what God was doing, knowing God was watching us right back. It felt like the best place of all to be.

ITALIAN STYLE MEATBALLS
Makes 30 or more meatballs.  Plan on 3-4 per serving.
Ingredients:
3/4 pound ground beef
1/4 pound ground pork
1/4 pound ground veal
1/2 cup freshly grated Parmesan cheese
1/2 cup Panko bread crumbs
1 egg, lightly beaten
1 Tb. Italian seasoning
1 tsp. minced garlic
1/2 tsp. onion powder
1 tsp. salt
1 tsp. pepper
2 Tbs. olive oil

1.  Preheat oven to 375 degrees.
2.  Mix ingredients well by hand.
3.  Shape into golf-ball sized meatballs. Meatballs can be frozen at this point. Spread them out on a baking sheet uncovered and place in the freezer until frozen. Transfer to a bag or vacuum seal.
4.  Refrigerate approximately 15 minutes.


5.  Fry over medium high heat in olive oil until brown on the outside but still pink on the inside.
6.  Bake on a foil lined sheet for about 10 minutes.
7.  Wipe out skillet used to fry meatballs and add enough homemade tomato sauce or marinara for your desired dish.  Heat over medium heat.
8.  Return meatballs to the pan and simmer briefly in the sauce before serving with pasta or on a delicious meatball sub.  Meatballs simmered in tomato sauce can be frozen if not eaten.  This will make a quick meal on a night when you don't have time to cook!

Saturday, October 9, 2010

Stocking the Larder

Something about the cooler weather makes me think I need to stock the larder, lay up a few things for the colder months.  I guess bears do the same kind of thing when they sense a change in the weather and work extra hard to hunt, gather and consume as many fruits, plants and nuts as they can in order to fatten up for the shorter days and long winter.  I have no plans to hibernate in days to come, but when the sun starts to set before 6:00, I do find myself gravitating toward pajamas and a good book, a bit of a cave dweller myself.  And it is somewhat reassuring to have a little something in the freezer to set the pace for quick dinners in the colder months. Nothing is quite as diverse and heartening as a good tomato sauce, chock full of onions and garlic, carrots and celery.  At the ready for a quick pasta dish or smeared on a pizza crust, spooned across a meatball sub, giving a leg-up to lasagna, eggplant or chicken parm, a good homemade tomato sauce is ever so much better than anything you can pour out of a bottle or can.

Here is a recipe that has become a staple in my freezer in recent months.  When I grabbed the last pint out of the freezer for two plates full of spaghetti and meatballs the other night, it was time to pull out my favorite pot (a vintage WearEver that was a wedding present to Paul's mother in 1941) and fill the house with aromas that would make you think someone's Italian grandmother had taken up residence.  Once again, my foodie flank man ferreted this recipe out of Esquire magazine.  The pictures of Giadi De Laurentiis dressed in a slinky cream colored cocktail dress getting up close and personal with crushed tomatoes may have caught his attention, but I really believe he was just thinking ahead to romantic pasta dinners with me!  ANYWAY, I like the symmetry of the ingredients in this recipe--2 of this and 2 of this and 2 of this--easily halved and also easily committed to memory after one or two batches.  My larder is stocked, at least for the next couple of weeks. You'll feel better prepared for the shorter days ahead when you have a couple of quarts stowed away, too!

Giada's Homemade Tomato Sauce
adapted from Esquire Magazine


1/2 cup extra-virgin olive oil
2 small onions, finely chopped
2 garlic cloves, finely chopped
2 celery stalks, finely chopped
2 carrots, peeled and finely chopped
1/2 teaspoon sea salt, plus more to taste
1/2 teaspoon freshly ground black pepper, plus more to taste
2 32-ounce cans crushed tomatoes
2 dried bay leaves

1.  In a large pot, heat the oil over medium-high heat.  Add the onions and garlic and sauté until the onions are translucent, about 10 minutes.  You'll have to stir pretty frequently to keep the garlic from browning too much.

2.  Add the celery, carrots and 1/2 teaspoon each of salt and pepper.  Sauté until all the vegetables are soft, about 10 minutes.
3.  Add the tomatoes and bay leaves, and simmer uncovered over low heat until the sauce thickens, about 1 hour.

4.  Remove and discard the bay leaves. Season with more salt and pepper to taste.

Makes about 2 quarts.

How to get the sauce to stick to the pasta:  Giada says, "Before you strain the pasta, save 1/4 cup of the pasta water.  Then drain the pasta, add a little Parmesan cheese, then add your tomato sauce--and then mix in the reserved pasta water.  The starches in the water help the sauce stick.  It comes out really nice and creamy."


My note:  I like the Cento brand tomatoes, and they come in either 28 or 35 ounce cans.  I opt for the 28 ounce cans so the veggies are a little more prominent in the sauce.  

Saturday, October 2, 2010

Grilling is Not for Sissies!

Grilling is DEFINITELY not for sissies!  If you are a female reader who is going for the June Cleaver look, grilling is not for you, for you will most certainly find yourself playing with fire.  I am absolutely certain June Cleaver never played with fire, never hovered over a hot grill while Ward was making his way home from the office.  When you commit yourself to becoming a grill master, flareups will be typical and the aroma of smoke will linger on your person long after the last bite of your meal has been devoured.  And hanging around all that fire and smoke--you guessed it--leads to perspiration, sometimes actual sweating ensues.  If you are sporting a hairstyle that goes limp with heat, you can kiss that look goodbye. You should also keep in mind that being outside puts you at the mercy of the voracious appetite of any flying insect who may be hovering nearby. A hungry mosquito can hone in on a female griller faster than ants show up at a picnic.  And then, of course, if you share the outdoors with any pets, particularly large ones, they will position themselves between you and the grill, wrap themselves around your legs and do their very best to work their nose into whatever meat you may be balancing. Be assured they will not leave your side for even a minute, even if you use your "I mean business" voice, because they ain't stupid.  They know EVERY griller is bound to drop something when they are flipping it and you look particularly inept to your very intelligent dog.

All that said, I think every woman who loves to cook, and perhaps even more particularly those who don't, should embrace the grill, make friends with fire, go in search of her inner macho and get to know that behemoth fire pit residing in her back yard.  I can give you three good reasons right off the bat, and I'm sure many of you can add to my list quite easily.  For one thing, grilled food is generally healthier.  Even fattier cuts of meat divest themselves of much of their fat on a grill and the flavor infused by grilling can make up for a lack of fat in leaner meats.  Second, with just a little thought and preparation, you can prepare a whole meal on the grill, making cleanup a snap.  If you take just a few minutes to clean up after your kitchen prep, with the help of a little foil you can serve your dinner with a clean kitchen behind you.  And third, the sense of empowerment you get from knowing your way around a grill is not something to be minimized.  When I fire up the grill and grab the BIG tongs and flipper, I feel strong and capable, formidable and unflinching, a force with which to be reckoned.  In the words of the immortal Helen Reddy (check Wikipedia if you are under 50) "I am woman, hear me roar."

So girls, get grilling! Don your best heavy duty apron, grab the BIG tongs and enjoy this fall weather as you impress someone (maybe best of all, impress yourself) with what you can accomplish on the grill.

Chicken and Asparagus on the Barbie
Recipe posted feeds two.


Marinade for 2 chicken breasts:
1/3 cup extra virgin olive oil
juice of 2 lemons
1 teaspoon grated lemon zest
1 tablespoon red wine vinegar
1/2 teaspoon salt
1/2 teaspoon dry oregano
1 teaspoon dijon mustard
1 clove garlic, minced or pressed

1 "bunch" of asparagus
extra virgin olive oil
salt and pepper
2 "hands full" of arugula

1.  Mix together all ingredients for the marinade.

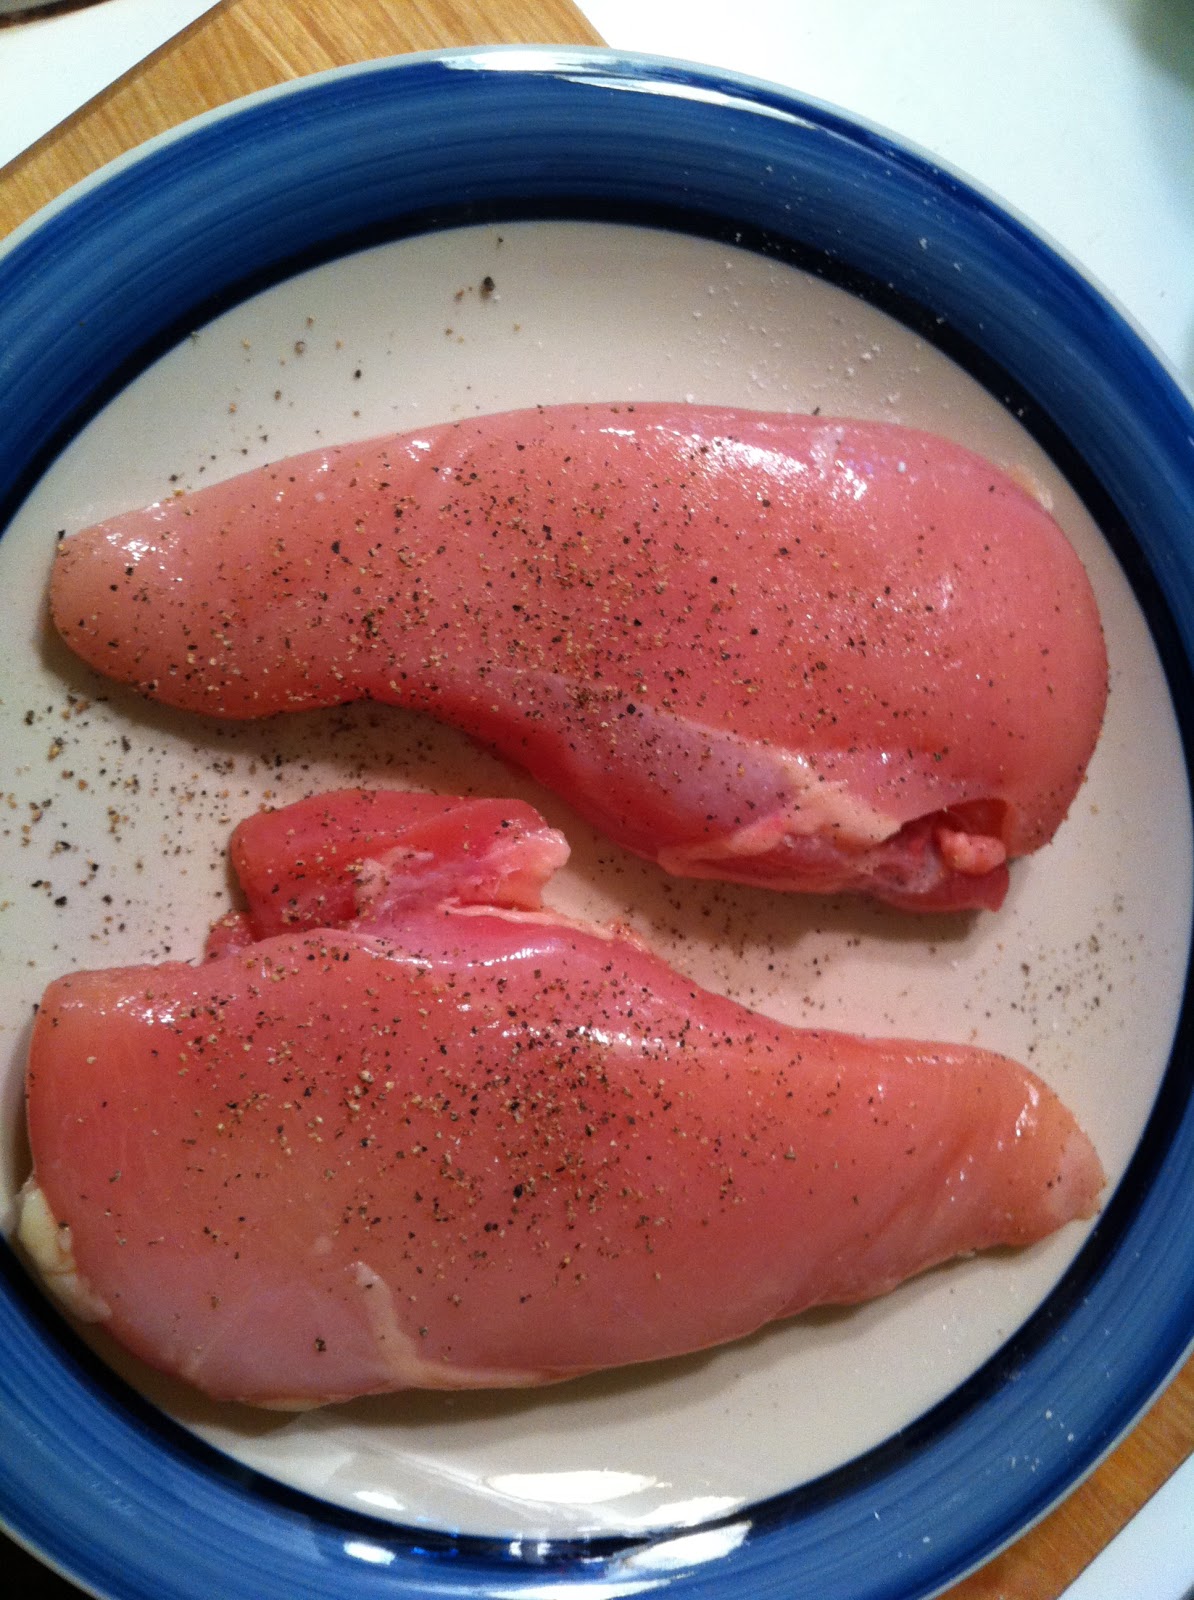
2.  Sprinkle both sides of chicken with salt and pepper.  Pour all but 1/3 cup of the marinade into a quart-size plastic bag with the chicken and refrigerate at least a half hour.  Reserve the 1/3 cup of marinade to drizzle on the chicken after grilling.  If you clean up everything you have used in the kitchen up to this point, you will have very little cleaning to do after dinner.
3.  Preheat a gas grill or charcoal grill to medium high heat. Line a baking sheet with 2 layers of foil.  (This tip is one I learned from my mother and really helps make cleanup a snap.  The top layer will be thrown away after everything goes on the grill, leaving you a clean piece of foil when you remove food from the grill.)  Toss the asparagus on the foil with a good drizzle of olive oil and a sprinkling of salt and pepper.  Put the bag of chicken on the baking sheet and transport all to the grill along with another piece of heavy duty foil big enough to cover half the grill.

4.  Line half the grill with the heavy duty foil.  Put asparagus on the foil and use tongs to spread out to a single layer.  Remove the chicken from the bag letting most of the marinade drip back into the bag and place chicken at an angle on the other side of the grill. Cover grill for about 1-1/2 to 2 minutes.

5.  Open grill again and turn the chicken 1/4 turn.  This will give you a nice cross-hatch of grill marks on your chicken.  Use the tongs to move the asparagus around so it can brown on all sides.  Close grill again for about 2 minutes.  From this point on, every time you open the grill, move the asparagus around a little.

6.  Remove the top layer of foil from the baking sheet.  Wrap foil around the bag with the leftover marinade and throw away.

7.  Open grill and flip the chicken.  At this point, I insert a "poultry button" into the thickest part of one of the pieces of chicken.  A poultry button is a very small meat thermometer designed just for chicken.  It doesn't give you the inner temperature of the meat, it just shows you when it is done.  [Click here to find out more about a poultry button.] Chicken will be almost done at the point you flip it.  Close the grill another couple of minutes and and then check it again.

8.  When chicken is done, the asparagus will most likely be done, also.  Remove chicken and asparagus and place on the foil lined baking tray.

9.  To serve, place a clump of arugula on each plate.  Place the chicken alongside the arugula and drizzle both the chicken and the arugula with the reserved 1/3 cup of marinade.  (This is the marinade you reserved at the very beginning of the recipe that has never come into contact with raw chicken.)  Divide the asparagus between the two plates.

10.  Throw away the piece of foil on the baking sheet.  This may be overkill, but I put the baking sheet in the dishwasher just in case any chicken juices may have seeped underneath the foil.

Note:  I served this meal without bread, but if you have a warming rack on your grill, you could easily wrap some bread in foil and place it on the warming rack the whole time you are grilling the chicken and it will be ready at the same time.  I had some figs beginning to wane in the vegetable crisper, so I stuffed those with a little goat cheese and placed on the grill next to the asparagus.  If I had bacon, I would have wrapped the stuffed figs with little pieces of bacon.  I served the cooked figs drizzled with a little honey and balsamic vinegar.

YOU GO, GIRLS!  And guys, too...for my gentlemen readers, we are not wanting to infringe on your territory.  We just want to SHARE a little.

Tuesday, September 28, 2010

What We Do on September Saturdays

I want to start out being perfectly clear about one thing.  I am a Georgia Bulldog fan first and foremost, through and through.  I didn't spend 4 years in Athens, 3 of them shared with Herschel Walker, witness to a national championship season for nothing.  No matter HOW BAD the season gets, I am still a fan.  Even if the unimaginable happened and the Bulldogs lost their first 3 conference games, I'd still be a fan--not that THAT would ever happen!
But these days, my September Saturdays (and October and November) are mostly spent in the Loveliest Village on the Plains.  And I don't really mind so much.  I was raised by an Auburn man, married an Auburn man, and am currently helping put an Auburn man through college, so I have many parts of my heart that linger there already.  My dad never liked the crowds much at football games, but I can remember raking leaves alongside him on crisp fall Saturdays, a transistor radio at his side listening to an Auburn football game.  I remember him explaining to me the difficult SEC puzzlement of how a team can claim to be "the Tigers" and have a battle cry of "War Eagle."  And when it came time for me to choose a college, I was 99% committed to UGA, but I had my SAT scores sent to Auburn just because.  So I can with a clear conscience don my best orange and navy garb and cheer wildly for the Auburn Tigers for 11 out of 12 games each year.  (I do make sure Paul and any other Auburn fan who will listen know that human beings would never willingly put those colors together in their wardrobe were it not for college football, unlike the pleasing combination of red and black.)

What would college football be without tailgating, the lovely tradition that turns a college campus into a sea of folding tables, decorated in orange and blue and spread with the most amazing tableaus of edible wonders? Folks load up their SUVs and trucks and trailers and haul their grills and smokers, generators, big screen TVs, tents and chairs and coolers and make a full day of feasting and fellowship as important a part of the festivities as what happens on the field.  Well, no matter how good the pork spareribs are, it won't really ease the blow of a stinging loss to an able opponent, but it will blunt the pain a tiny bit!  So the food is important.  It needs to be tasty, easy to eat from your lap while sitting in a folding chair, and there needs to be lots of it.  One never knows how many friends may drop by for a little visiting, prognosticating and noshing.  (Let's be honest, there's a little drinking in the mix, too.)

Here is my menu from this past Saturday, where the food was good, the company was great and the 35-27 win over South Carolina was icing on the proverbial cake.  (We like to see Steve Spurrier toss his visor in disgust--another proud SEC tradition!)

Menu
Brie and Grana Padana Cheeses with Mini Bread Toasts
Seedless Black Grapes
Mixed Nuts
Grilled Chicken Wings (recipe follows)
Grilled Conecuh Sausage
Homemade Pickle Relish
Potato Salad with Sour Cream and Dill
(recipe follows)
Orzo and Veggie Salad
Zapps Potato Chips
Chocolate Chunk Cookies


Grilled Chicken Wings
4 pounds chicken wings
1 teaspoon kosher salt
1/4 teaspoon smoked kosher salt (optional)
1/2 teaspoon paprika
1/2 teaspoon fresh ground pepper
1/2 teaspoon cayenne pepper
1/2 bottle Frank's Red Hot Buffalo Wing Sauce


1.  If wings are whole, separate the drumette and remove and discard wing tip.

2.  Mix together kosher salt, smoked salt, paprika, ground pepper and cayenne pepper.

3.  Toss chicken wings and drumettes with salt mixture.

4.  Put wings in a large plastic bag and pour in the wing sauce.  I double bag this because wings have sharp edges and a cooler mixed with chicken juice and hot sauce would not make for happy tailgating.  

5.  Refrigerate or pack in cooler until ready to grill.

6.  Grill over hot coals or gas grill until meat is tender, skin is brown and meat starts to separate from the bone. 

7.  Can serve with blue cheese dressing, but make sure you put your "refrigerate only" bottle of dressing in the cooler and not in the sack with the non-perishables.  I speak from very recent experience!


Potato Salad with Sour Cream and Dill
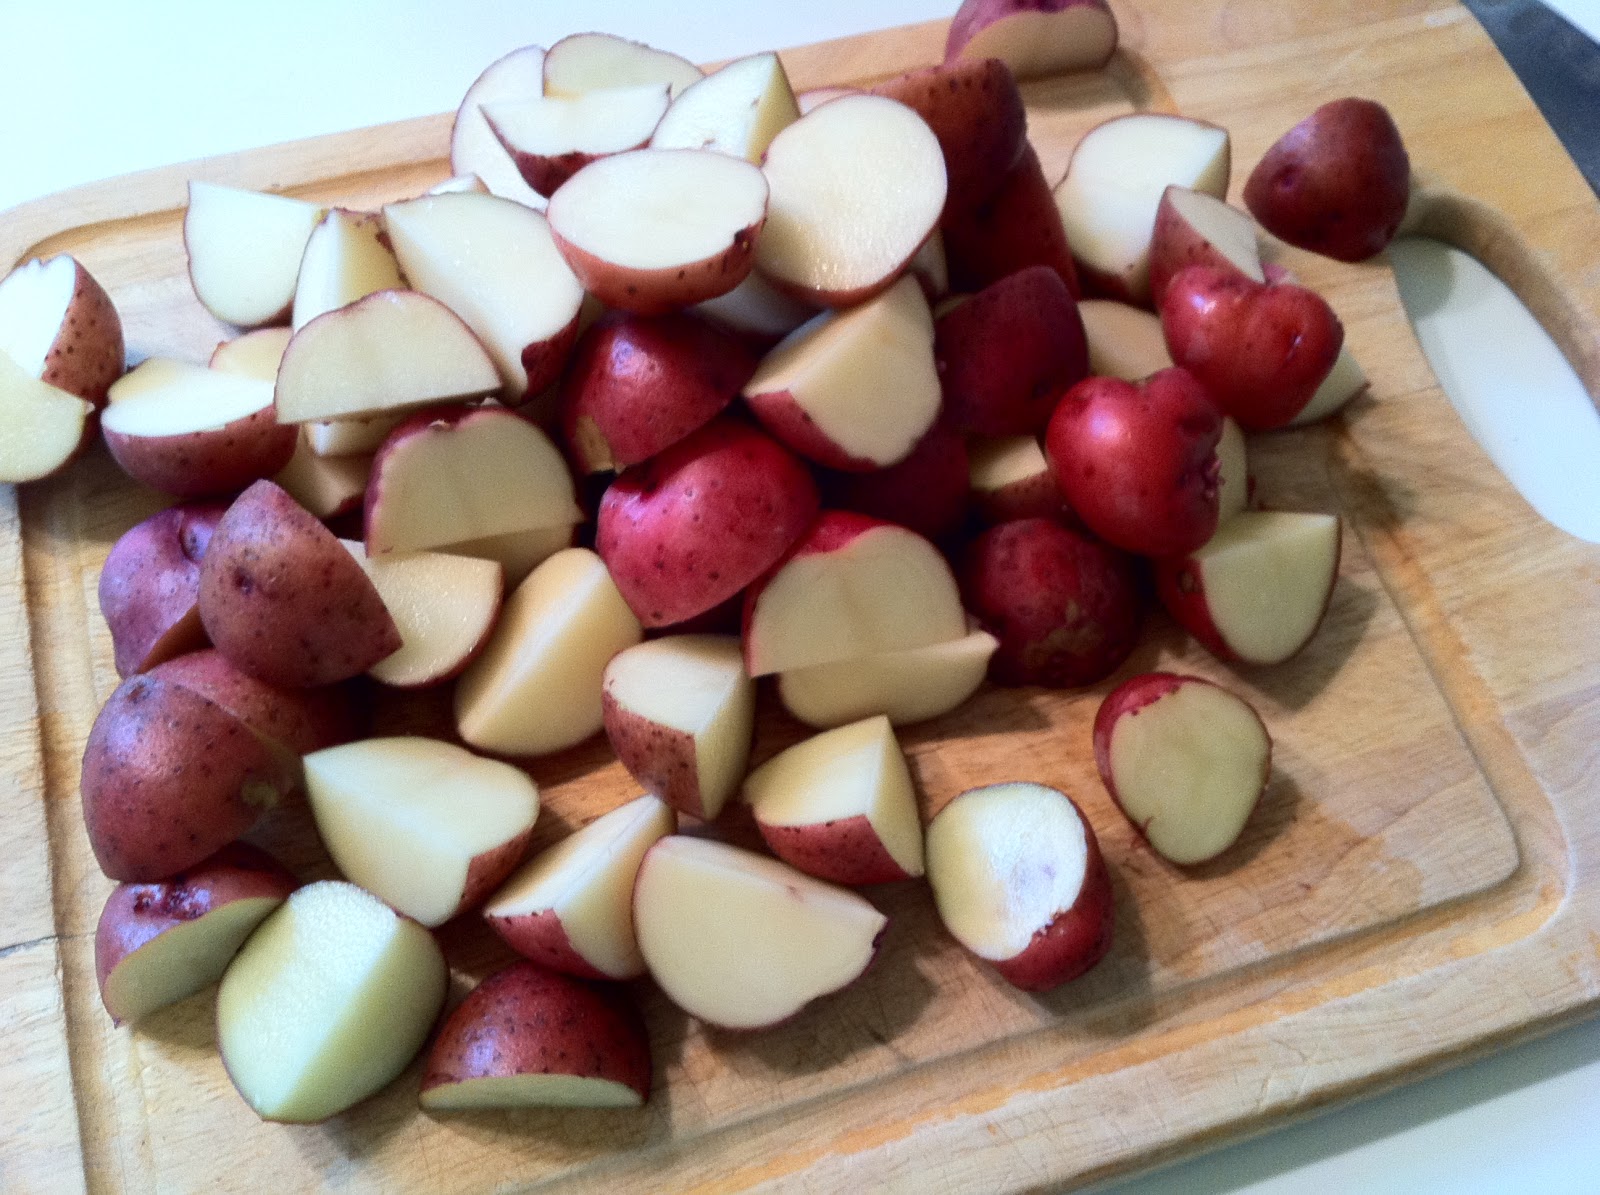
2 pounds small red skin potatoes (the smallest you can find)
1/2 cup sour cream
1/2 cup mayonnaise
2 tablespoons chopped fresh dill weed
3 green onions, finely chopped (save some of the dark green part for garnish)
1 teaspoon kosher salt
fresh ground pepper to taste


1.  Cut smallest potatoes in half and large potatoes in quarters.  Boil until fork tender but not pulpy.  Drain well.

2.  Mix together sour cream, mayonnaise, dill weed, green onions, salt and pepper.

3.  Put potatoes in a medium bowl and pour dressing over the potatoes. Toss lightly without breaking potatoes.
4.  Sprinkle with reserved dark green onion slices for garnish.