Showing posts with label Vegetarian Recipes. Show all posts

Monday, May 2, 2011

Different can be Good

Pumpkin Squash from Bee Natural Farm
People are creatures of habit.  Perhaps some of our most ingrained habits surround the foods we buy and how we cook them.  We trace the same path each time we head into the supermarket, filling our carts with the safe and familiar. Most times we pass by the unfamiliar with little or no curiosity.  A truth I have come to realize is that if my local grocer carries an item on a regular basis, there is some shopper out there who buys that ingredient fairly often, at least often enough to keep it in stock on the shelves. Therefore there must be some culinary options for the unknowns that are pretty darn good.

For many years, I passed through the produce section regularly without giving much notice to the bin of squashes.  If anything I probably registered them as a decorative element, bringing to mind the "horn of plenty" we see at Thanksgiving each year, placed there to make me think there is some sort of real harvest happening close by. Ambience, that's what they were to me.  And then about a decade ago I was propelled into the land of unknown squashes.  First, I began to see more and more things made with butternut squash, and actually TRIED butternut squash ravioli and found it to be amazing.  As a matter of fact, I love butternut squash ravioli, simply dressed with a bit of brown butter and fried sage leaves.  Ooh la la, not much better!  So, I investigated the squash bin to see if I could identify ye olde butternut squash.  There she was, looking indeed like a big nut of some kind.  Alongside the butternut was another little squashy that looked like a big old acorn.  Hence the name on the label, "acorn" squash. I tucked that knowledge away in the back of my mind knowing it would come home to roost at a later time.  And indeed it did.

Several, several years ago, at Thanksgiving--the official celebration of harvest and all things good and plentiful on the table--acorn squash jumped back into the forefront of my vision when I perused a special recipe section in the Atlanta Journal Constitution food section.  They featured a recipe for "Acorn Squash with Maple Georgia Pecans and Goat Cheese."  This recipe was included as a vegetarian main dish alternative in the traditional Thanksgiving feast.  Well, they had me at goat cheese.  I never met a recipe with goat cheese I didn't like.  This was no exception.  Omnivore that I am, I did not give up my Thanksgiving tryptophan (read Turkey.)  But I did try this recipe and have made it a few gazillion times since because it is so good.  It is a great alternative to the baked potato, or mashed sweets, or rice, or other starch you place alongside your meat.  It is indeed also a great centerpiece entree in a Meatless Monday meal.  It adds heft to greens and a salad, and the denseness of the squash balances out lighter offerings quite nicely.

One of the highlights of my life this year is that I became a member of the Bee Natural CSA in Baldwin County.  It is the only true CSA in this region and sports a two year waiting list.  When I moved to this area, I plopped myself onto that waiting list, called annually to plead my case, and then got THE LETTER this January saying that I had been accepted.  Remember Steve Martin in a movie called, The Jerk, finding his name in the phone book and announcing, "I'm somebody now"?  Picture me jumping around in my kitchen waving the official letter in my hands proclaiming my secure footing in this world.  I AM A CSA MEMBER.

My first pick-up this spring gave me a choice between a couple of cellared items: sweet potatoes or pumpkin squash.  Committed to taking the food road less traveled, I chose the pumpkin squash, which looked quite a bit like my old friend the acorn squash, only a little less green and a bit more like a diminutive candidate for a good old Halloween carving.  Not having a clue what the inside would be like, but taking my cue from the butternut and acorn varieties, I cooked it up with my tried and true pecan and goat cheese accompaniments.  This was such a good dish that I chose the pumpkin squash over the sweet potatoes the next three weeks.  Maybe you've got a little squash friend making an appearance in your CSA box, or maybe you'd like to get a little better acquainted with the squash bin in your supermarket.  Or maybe you have done baked potatoes until you just can't stand to butter up another.  Or perhaps I had you at "goat cheese."  Something different (with a little goat cheese on top) can be VERY good.

ACORN (OR PUMPKIN) SQUASH WITH MAPLE PECANS AND GOAT CHEESE
adapted from the Atlanta Journal Constitution and the Georgia Pecan Commission

Note:  Each squash makes 2 servings.  Quantities listed are for 1 squash.  This can easily be doubled, tripled or quadrupled to feed as many folks as you have invited round the table.
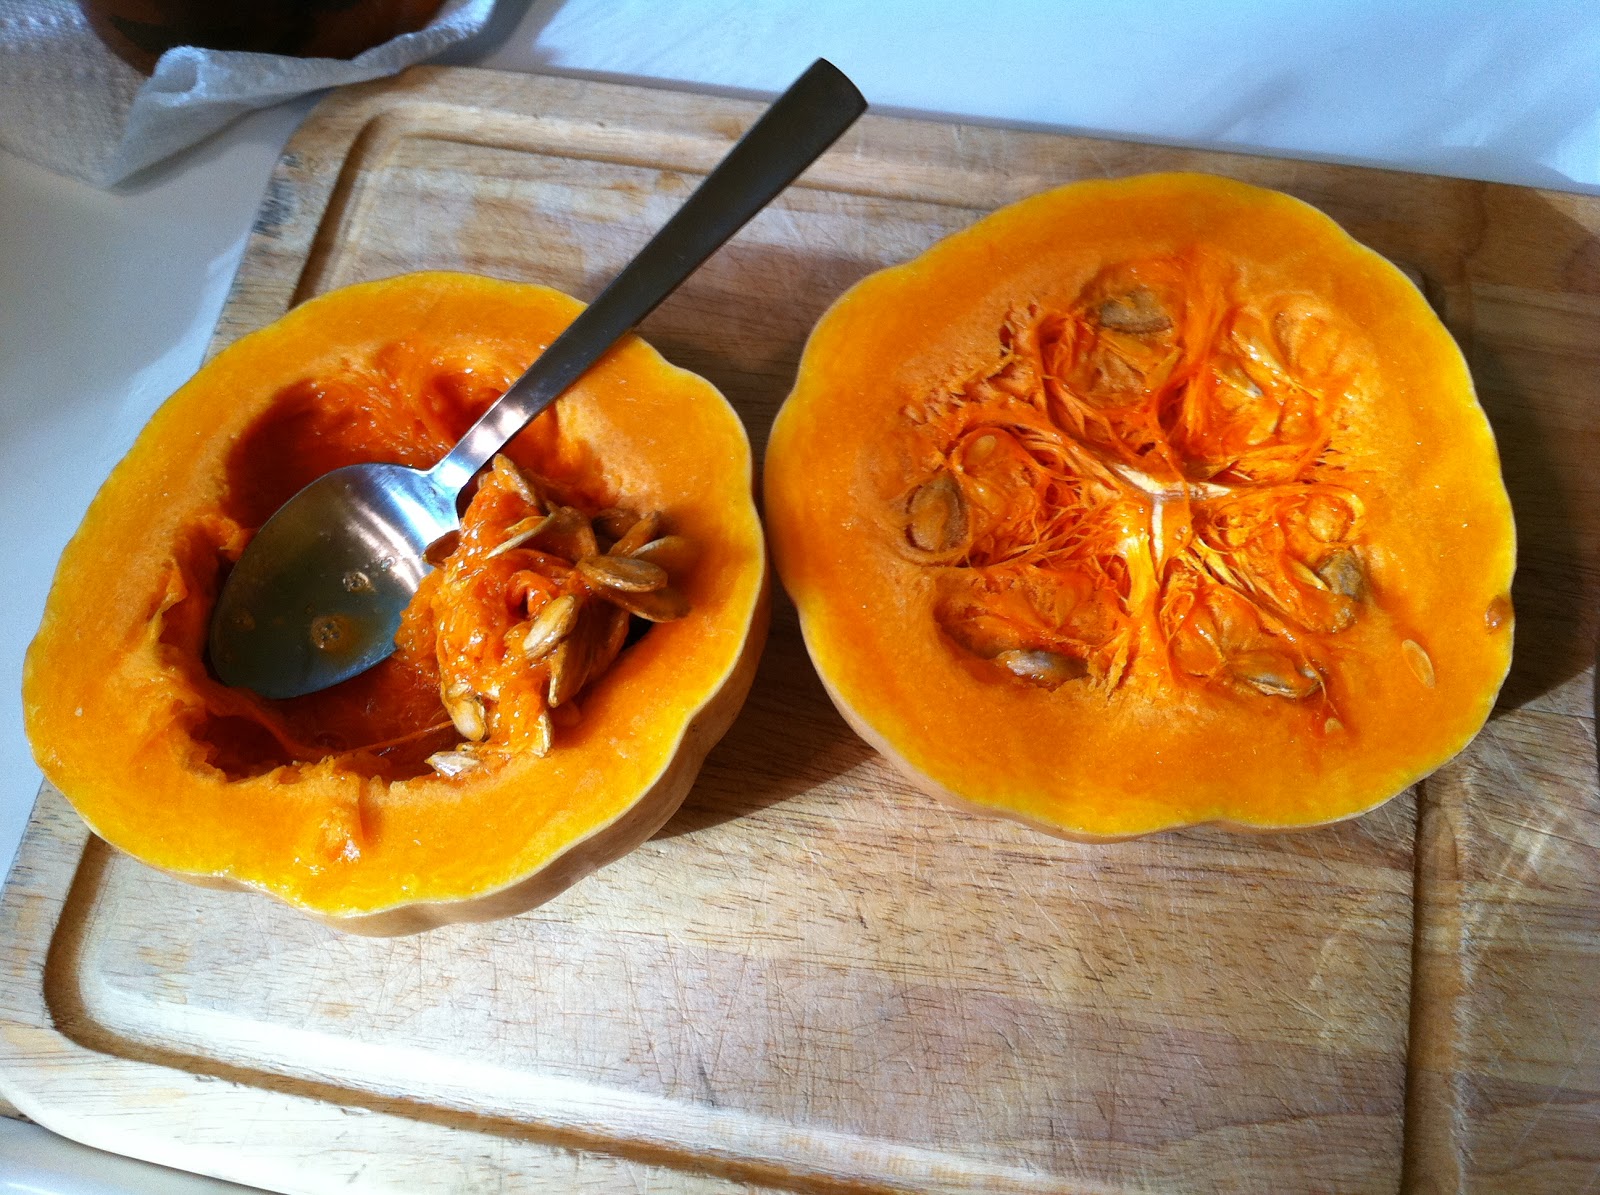
1 acorn squash, halved crosswise and seeded
dash of salt
1 Tbs. melted butter
1/3 cup chopped pecans
1 Tbs. real maple syrup, plus more to drizzle
1/4 tsp. fresh thyme leaves or a dash of dry
2 ounces goat cheese (feta would work)

1.  Preheat oven to 375 degrees.

2.  Line a baking sheet with foil or parchment paper.
3.  Sprinkle the inside of the squash halves with salt and brush with melted butter.


4.  Turn upside down and bake for 30 minutes. (I slice the pointy end off the squash so it will eventually sit flat on a plate.)

5.  In a bowl, combine the pecans, maple syrup and thyme.

6.  Place a heaping tablespoon of the pecan mixture in the hollow of each squash half.
7.  Place a one ounce round of goat cheese (or one ounce crumbles) over the pecan mixture in each squash half and top with the remaining pecan mixture.

8.  Bake upright 10 minutes.  Drizzle with more syrup as desired.

Tuesday, April 26, 2011

Light and Fresh

From Bee Natural Farm CSA, Baldwin County
We herald the arrival of spring as we would a visit from a long absent friend. Cold toes and fingers begin to thaw.  Tiny green leaves appear tentatively on trees and shrubs, then seem to grow more confident each day.  Camellias give way to daffodils, then azaleas and dogwoods.  Birds sing and chirp with gusto as they begin to build their nests in earnest.  God's hand is seen at every turn.  It seems no accident nature points to a Master Designer this time of year as Lent gives way to a glorious Easter celebration.  The new birth seen all around us is the emphatic exclamation point for the power of Resurrection.

It is with great thanksgiving and praise I begin to noodle around in my kitchen this time of year.  We are on the threshold of great eating, when words like "local" and "seasonal" become more than just theory.  The most ardent locavore among us has by now surely succumbed to the less than ideal vegetal offerings found in our supermarkets and we have certainly been disappointed by the lack of flavor and freshness we have found there.  But now we return in droves to our local farmers' markets as diligent farmers and gardeners begin to harvest their first fruits.  We delve into our CSA boxes with the fervor of a six year old ripping through Christmas paper after weeks of hungrily surveying the neatly wrapped packages.

It is April and salad is the star of the show rather than a minor first act.  In January and February we may have a salad with our meal, but only because that is how we are accustomed to putting a meal together.  In April, a salad is composed with great tenderness, inspecting the different textures and colors, knowing we can hardly go wrong with ingredients so fresh.  There are as many ways to dress a salad as there are people who eat salads.  But as I put together delicate greens, crunchy radishes, crisp carrots, and spring onions, I want a dressing that will let the flavors and textures shine. This light dressing, yogurt meets avocado and fresh lemon juice, works for me and it may be just right for your spring salad, as well.


Avocado Yogurt Dressing
1 avocado
1/2 lemon
1/2 cup plain yogurt (Greek or regular)
1 Tbs. chopped fresh dill
salt and pepper to taste
milk for thinning

1.  Remove avocado from its peel with a large spoon.  Mash with the back of a fork.

2.  Squeeze a bit of lemon juice over the avocado.  Work into the avocado with your fork.

3.  Add mashed avocado to the yogurt.  Squeeze any juice remaining in the lemon half into the yogurt.  Mix well.

4.  Add chopped dill to the avocado mixture.  Add salt and pepper to taste.

5.  Thickness will vary depending upon what kind of yogurt you use.  Leave it nice and thick and it is a perfect dip for veggies.  Thin it with milk, about a teaspoon at a time, until it is the consistency you want for a salad dressing.  Leave it thick enough to cling nicely to the salad ingredients.


Saturday, October 9, 2010

Stocking the Larder

Something about the cooler weather makes me think I need to stock the larder, lay up a few things for the colder months.  I guess bears do the same kind of thing when they sense a change in the weather and work extra hard to hunt, gather and consume as many fruits, plants and nuts as they can in order to fatten up for the shorter days and long winter.  I have no plans to hibernate in days to come, but when the sun starts to set before 6:00, I do find myself gravitating toward pajamas and a good book, a bit of a cave dweller myself.  And it is somewhat reassuring to have a little something in the freezer to set the pace for quick dinners in the colder months. Nothing is quite as diverse and heartening as a good tomato sauce, chock full of onions and garlic, carrots and celery.  At the ready for a quick pasta dish or smeared on a pizza crust, spooned across a meatball sub, giving a leg-up to lasagna, eggplant or chicken parm, a good homemade tomato sauce is ever so much better than anything you can pour out of a bottle or can.

Here is a recipe that has become a staple in my freezer in recent months.  When I grabbed the last pint out of the freezer for two plates full of spaghetti and meatballs the other night, it was time to pull out my favorite pot (a vintage WearEver that was a wedding present to Paul's mother in 1941) and fill the house with aromas that would make you think someone's Italian grandmother had taken up residence.  Once again, my foodie flank man ferreted this recipe out of Esquire magazine.  The pictures of Giadi De Laurentiis dressed in a slinky cream colored cocktail dress getting up close and personal with crushed tomatoes may have caught his attention, but I really believe he was just thinking ahead to romantic pasta dinners with me!  ANYWAY, I like the symmetry of the ingredients in this recipe--2 of this and 2 of this and 2 of this--easily halved and also easily committed to memory after one or two batches.  My larder is stocked, at least for the next couple of weeks. You'll feel better prepared for the shorter days ahead when you have a couple of quarts stowed away, too!

Giada's Homemade Tomato Sauce
adapted from Esquire Magazine


1/2 cup extra-virgin olive oil
2 small onions, finely chopped
2 garlic cloves, finely chopped
2 celery stalks, finely chopped
2 carrots, peeled and finely chopped
1/2 teaspoon sea salt, plus more to taste
1/2 teaspoon freshly ground black pepper, plus more to taste
2 32-ounce cans crushed tomatoes
2 dried bay leaves

1.  In a large pot, heat the oil over medium-high heat.  Add the onions and garlic and sauté until the onions are translucent, about 10 minutes.  You'll have to stir pretty frequently to keep the garlic from browning too much.

2.  Add the celery, carrots and 1/2 teaspoon each of salt and pepper.  Sauté until all the vegetables are soft, about 10 minutes.
3.  Add the tomatoes and bay leaves, and simmer uncovered over low heat until the sauce thickens, about 1 hour.

4.  Remove and discard the bay leaves. Season with more salt and pepper to taste.

Makes about 2 quarts.

How to get the sauce to stick to the pasta:  Giada says, "Before you strain the pasta, save 1/4 cup of the pasta water.  Then drain the pasta, add a little Parmesan cheese, then add your tomato sauce--and then mix in the reserved pasta water.  The starches in the water help the sauce stick.  It comes out really nice and creamy."


My note:  I like the Cento brand tomatoes, and they come in either 28 or 35 ounce cans.  I opt for the 28 ounce cans so the veggies are a little more prominent in the sauce.  

Thursday, August 26, 2010

More Veggies, Please

Meatless Monday has been a revelation to me.  Or perhaps not so much a revelation as a reminder--I LOVE VEGGIES!  The discipline of choosing non-meat alternatives one day a week has spilled over into the other six.  I remember now how much I truly enjoy vegetables, the taste, the texture, the variety, the versatility.  When you direct your meal planning in the direction of vegetarian alternatives for just one day, your brain more readily includes and considers these options EACH time you think about what's for supper--or for lunch--or on the restaurant menu.  Over the past 2 weeks since I dedicated myself to more meatless living, I have cooked eggplant Parmesan, grilled portobello sandwiches, pasta with chunky marinara and bread salad.  And just yesterday when dining out with a friend, I gravitated toward an eggplant-filled panini as my lunch choice.  In nary a meal did I miss the meat, nor has my significant one.  (I speak on his behalf.  At least he hasn't complained in range of my hearing. He has made lots of yum-yum noises, which is always a good sign!)

One of the tricks is to keep vegetables on hand and actually USE them before they go bad.  We all hate to feel wasteful and one of the greatest guilt inducing moments for me is when I have to clean out the vegetable bin and find myself throwing out things that should have, could have been eaten and enjoyed--if only I'd been more inventive, worked a little harder, decided to cook supper instead of accepting Paul's invitation to dine out.  It is sometimes hard being a cook with a conscience--and a budget!

Earlier this week, I made a quick stop at Hazel's Market in Daphne to stock up on some of summer's bounty.  I came out with these:


If you spy something in the bowl that doesn't quite look like it was picked from a tree or pulled from the dirt or plucked off a vine, you would be the astute one.  That is a nice chunk of hoop cheese packaged in Chickasaw, Alabama, so if it isn't completely local, at least it has cousins who are.  I couldn't pass that up!  It is the cheese of my childhood, the cheese we all ate before there were other options.  The Italians may have their Parmesan and mozzarella, but in the South, we have hoop cheese.  I didn't have a plan for it at the time, other than to make sure I ate it quickly so I wouldn't have to share.

I bought small quantities of the things that would spoil.  Just one zucchini, one yellow squash, several tomatoes (tomato sandwiches equal easy vegetarian lunches) and 3 cloves of garlic which will last in my garlic keeper nearly forever, or at least until I use them.

So, Paul is traveling and I needed dinner for one last night.  I decided on a veggie quesadilla.  If you have been reading this blog at all, you may have come to the conclusion that I can make a taco or a quesadilla out of most anything.  You would be correct.  And that is truly a way to make a quick meal that will satisfy even the picky eaters at your table.  If you have enough fillings, you can customize the meal a bit without feeling like a short-order cook.  For me last night, a tortilla filled with a smattering of hoop cheese and a heap of veggies was a healthy choice and amazingly tasty.  This is not so much a recipe I offer you today, but a meal suggestion that you can customize according to whatever may be reaching its prime in your vegetable bin.

Let me add that we have a new grill.  We've been biding our time on sub-par grills until we permanently install one in the little cottage up the street that we are renovating.  Model "C" purchased from the corporate behemoth finally rusted out.  We upgraded to a slightly better model that we hope will tide us over until we're ready to throw some serious cash at an outdoor cook space, sometime in the future when we win the lottery.  Here's the newest addition to our outdoor kitchen here in our little rental, only a slight upgrade from model "C":

Grilling is a great way to cook vegetables.  You can choose whatever vegetables you have in the food prep queue in your kitchen.  I chose these from my trip to Hazel's.


I sliced about half of the squash and zucchini, about a quarter each of the onion and tomato, and all of the little red pepper.  I use the same "technique" for a veggie quesadilla as I do for my roasted tomato salsa, spreading the veggies on a sheet of foil in a single layer directly on the grill rack after I have tossed them with a little olive oil, salt and pepper.


Here is a secret ingredient I've been using lately:


This is smoked kosher salt.  I ordered it from Amazon and it will probably last forever.  I heard two chefs  proclaim its glories as an ingredient in two separate cooking classes and decided I needed my very own supply.  This is a good addition to vegetables cooked on the grill.  Use sparingly as it can get overwhelming if you use too much.

Anyway, I digress.  Back on the grill, we have veggies hanging out on a sheet of foil getting nice and happy!  Grill them with the lid closed over medium high heat until they begin to soften and brown on one side.  At that point, use long tongs to toss them about so they can brown and char a bit all over.  Don't let them get too soft.  A little crunch adds a lot to the taste of the finished product.  When they are done, use the tongs to lift the foil by all four corners, capturing the juice with the veggies. I empty mine into a bowl so they will be easier to work with.  They will look something like this.


Now, heat a non-stick skillet over medium high heat.  Add a bit of olive oil or cooking spray.  While it is heating, grate about an ounce of cheese per person.  You don't need a lot of cheese, but the cheese becomes the glue that holds the rest of the ingredients together.


Put the tortilla in the pan and spread the cheese around on it so it can begin to melt.


When the cheese begins to soften, add your vegetables on top of the tortilla.


Since I was cooking for one, I just doubled the one tortilla over.  Because I used lots of veggies, they squished out around the sides of the tortilla.  I liked it that way.  Any veggie that escaped the tortilla just got dumped on top of the quesadilla after I removed it from the pan.  If you are feeding several people or if you are very hungry yourself, you could top this with another tortilla instead of doubling one over on itself.  I think it is a bit more manageable to flip a tortilla that is doubled over rather than two stacked together.  But I am not the boss of you in your kitchen!


Cut it into quarters (or whatever.)  Serve with sour cream, salsa, jalapeno peppers, guacamole--all your choice.  This is a most flexible way to prepare a meal.  Some broccoli would have been good in this, as would mushrooms, roasted corn or spinach.  I wouldn't put spinach on the grill, I don't think.  You could just toss the spinach into the hot veggies as they come off the grill and the heat would wilt it adequately.  You could also toss a little cilantro into the hot veggies.  Lots of possibilities here to add a few more servings of the good stuff into your diet, and not be wasteful.  If you don't have a grill, do not despair!  You can accomplish the same thing with a baking sheet lined with foil under the broiler.

So, I was the one making the yum-yum noises last night, all by myself, congratulating myself because I had eaten a home-cooked, healthy meal and made good use of things on hand.  Go check out your vegetable bin right now.  You could be feeling satisfied and pious in no time!

Thursday, August 12, 2010

Meatless Mondays: I Think I Can Do This!


I lived for one year as a vegetarian.  Then I met my husband and two stepsons and realized we were going to become a family.  As the four of us began to merge our lives, there were many, many accommodations we ALL had to make along the way.  Two young boys, already juggling living between two households, now had the added challenge of this crazy woman in the mix who didn't eat meat.  I had only just begun to navigate successfully for myself the waters of living meatless in a world designed for carnivores.  Now, in our new family unit, I was the lone rower trying to move us upstream when everyone else on board was flowing with the current.  I did the easy thing and caved.  It wasn't hard to do, either, because I really like meat myself.  I had committed to a vegetarian diet in an effort to eat healthier, to include more fruits, vegetables and whole grains into my diet.  I was not and am not ideologically opposed to eating meat, as long as that choice is made responsibly and from a perspective of good stewardship.  I realize now, though, that I fall into the trap of allowing the meat in my diet to displace some of the things I need so much more.  I also am beginning to understand the cumulative toll mass production of meat is taking, the harm done to the environment, the inhumane practices of industrialized livestock production, the massive amounts of water used and the fossil fuels consumed.  The impact in our own community of the recent Deep Water Horizon oil spill should awaken all of us to the need to live simpler and closer to home.
This information is from the Meatless Monday website:  "Meatless Monday is a non-profit initiative of The Monday Campaigns, in association with the Johns Hopkins’ Bloomberg School of Public Health. We provide the information and recipes you need to start each week with healthy, environmentally friendly meat-free alternatives. Our goal is to help you reduce your meat consumption by 15% in order to improve your personal health and the health of the planet.
"Presidents Wilson, Truman and Roosevelt galvanized the nation with voluntary meatless days during both world wars. Our intention is to revitalize this American tradition. We’re spearheading a broad-based, grassroots movement that spans all borders and demographic groups. By cutting out meat once a week, we can improve our health, reduce our carbon footprint and lead the world in the race to reduce climate change."


I can do this!  This is one small step I can take and I embrace the challenge of seeking out meatless alternatives that are filling and fulfilling. (If it doesn't taste good and isn't fun to prepare, I don't want it!) I am approaching Meatless Mondays from the ovo / lacto perspective, so expect to see some dairy products make an appearance in the Meatless Monday recipes I provide from time to time.  I didn't get on board the "movement" until Tuesday of this week, so I practiced with one of my favorite go-to meatless recipes for dinner that night.  Maybe you'd like to give it a whirl next Monday!


Black Bean and Goat Cheese Quesadillas
(As printed in Prevention Magazine, February 1999.  See my notes and modifications below the recipe.)


2 teaspoons vegetable oil, divided
1 small onion, chopped
1 clove garlic, minced
1 19 ounce can black beans, rinsed and drained (see note below)
1/2 cup mildly spicy bottled salsa
1/4 teaspoon ground cumin
1/2 cup crumbled goat cheese (about 4 ounces)
1/3 cup chopped cilantro
Eight 6- to 8- inch flour tortillas


1.  Heat one teaspoon of oil in a large skillet over medium heat.  Add onion and garlic and saute 3 minutes until onions are translucent and slightly soft.
2.  Add beans, salsa and cumin; cook, mashing beans slightly, until combined, about 2 minutes.
3.  Remove mixture from heat; gently stir in the goat cheese and cilantro.

4.  Place 4 tortillas on a flat surface.  Spread some bean mixture over each one; top with another tortilla.  In a large skillet, use remaining oil to cook the quesadillas one at a time until golden, about 2 minutes per side.
5.  Garnish with good stuff:  salsa, sour cream, guacamole, more cilantro, you know what to do!


Just after adding goat cheese and cilantro...

After adding cheese and cilantro--trust me, it tastes better than it looks!

Dinner for One


My preparation notes:  I've been making this recipe for a long time, and I don't think I generally find a 19 ounce can of beans in my supermarket.  The can I had in the pantry this week was 15 ounces.  That will work fine!  You may want to add slightly less salsa to keep it from being too liquid and you may only get three hearty quesadillas instead of four.  Also, I never use the whole 4 ounces of goat cheese.  Goat cheese is very tangy and goes a long way for me.  Put in about 2 ounces, and then dip your spoon in and give it a taste test.  Use your judgment.  This is a great recipe for one person.   As one whose husband travels during the week, this is a recipe I can prepare that will feed me for several meals.  Just use however much you want for one meal and refrigerate the rest.  When your significant other gets back in town, warm the leftover bean mixture in the microwave and serve with tortilla chips as a dip.  It ain't pretty, but it sure tastes good!

Friday, August 6, 2010

File This Under "Why Not?"

Okra, okra, okra!  Every where I look, it's all about the okra. As I retrieved the Mobile Press Register from my front yard TODAY, there featured on the front were "Pods of Glory."  Southern Living also featured okra this month.  When it comes to okra, I have successfully flown under the radar for all these years--all these many years--without EVER having cooked okra.  It's not that I don't like okra.  Well, maybe it is.  Maybe the ugly truth is I have convinced myself that in general, okra isn't my thing.  The exception is pickled okra, the kind you buy in the grocery store alongside all the other pickles.  If the jar describes the contents as "spicy" or "hot," all the better.  But the southern standard is fried okra, and quite frankly, up until this summer my attitude has been, "Why bother?"


The big problem with my laissez faire attitude is that my husband LOVES fried okra, simply loves it.  I've been able to rest comfortably on my laurels all these years because my mother, Saint Ann, makes excellent fried okra and cooks it for Paul frequently enough that I have let myself off-the-hook.  But just days ago I got busted, backed into a corner in the worst way a cook can imagine.  As Paul and I were walking into the house, our neighbor pulled up to the curb with the most generous of offers.  "Do y'all eat okra?" she queried.  Don't you love Southern hospitality?  Paul, with all the eagerness of a 3 month old Cocker Spaniel, quickly declared his love for okra right there on the spot and accepted our neighbor's gift of a sack of just picked, right out of the garden, couldn't be fresher green pods of summer.  And hands them to me with a look of raw yearning written all over his face.  Now what?  What is a good wife to do?


My first thought was to shove them in the back of the refrigerator and hope he would just forget about them.  But then, looking at those big brown puppy dog eyes, my heart softens.  It can't always be just about me in the kitchen, right?  Every now and then, I need to cook his first choice, not mine.  The stars aligned for Paul as I reviewed my menu for the evening meal to see how I might incorporate okra and thought about my plan for fish tacos.  Fried fish tacos, that is.  If I already have an egg wash, seasoned cornmeal and hot oil all set for frying fish, how hard could it be to use the same preparation to give Paul what his little heart truly desires for dinner that night.  Count me in!  Fried okra, it is.  I must say, the results were pretty good.  Paul declared me the okra-frying queen and couldn't have been happier.  If marriage works on a point system, I was flush.


But now, having jumped on the okra bandwagon with our very kind neighbor, the okra keeps on coming.  This is not a one time commitment I have made, but now must make regular appearances on the Parker menu. The article in Southern Living this month came to my rescue and gave me a lovely idea.  As I have mentioned before, anything in a taco makes me happy, so how about an okra taco?  Again, not my idea.  Blame Southern Living for this one.  As Paul was traveling out of town this week and I had a fresh batch of okra on deck in the refrigerator and a little time to play in the kitchen, I decided to give it a try.  Why not?


I decided to do my own taste test and put the Southern Living recipe alongside the one I used last week and see how the two stack up.  The article in SL this month calls for a buttermilk bath instead of an egg wash before dredging the okra in cornmeal.  With a lot of okra to play with, I set up my test kitchen with a bowl containing an egg mixed with a cup of water and another bowl filled with about a cup of buttermilk.  My usual cornmeal coating is a little spicier than the SL version, so I decided to go with the status quo there.  So I cooked the first batch dipped in the egg wash, the second in the buttermilk and then mixed some of the buttermilk and egg wash together to see if a hybrid might be the best combo.  My hunch was there wouldn't be a very big difference, but you will see, as I did, a marked difference among the three.  The preparation at the top was with the egg and water.  In the middle is the buttermilk alone and finally, at the bottom, is the combination of egg and buttermilk.  The buttermilk gave the cornmeal coating a much better chance at hanging onto the okra.  Perhaps that is why Southern cooks have been dredging chicken pieces in buttermilk for years before frying it up.  At first, I thought perhaps the oil was at a better temperature by the time I got to the buttermilk coated okra, but then when I got to the last batch and combined the egg and buttermilk, the results regressed.  Now, what about taste?  I have to be perfectly honest and tell you I couldn't detect a huge difference flavor-wise in the three. But let's be even MORE honest and declare that if you are going to fry something, the crunchier the better.  Part of the taste experience when we eat fried foods has to do with the texture, not just the flavor, and the buttermilk won on that count hands down.


For many of you, a heaping helping of fried okra alongside whatever else is on your menu may be just the thing.  But for some of you, taking it a step further and throwing a little fried okra in a taco may be too alluring to pass up.  I thought it was pretty good.  For the okra purists among you and for the taco aficionados, this is for you.  You'll know what to do!


Fried Okra Tacos (adapted from Southern Living Magazine)


1 lb. fresh okra, cut into 1/2" slices 
1 cup buttermilk
1 cup self-rising yellow cornmeal mix
1 tsp. salt
1/2 tsp. paprika
1/4 tsp. cayenne pepper
Vegetable oil


1.  Combine okra and buttermilk in a large bowl.  Combine cornmeal mix, salt, paprika and cayenne pepper in another large bowl.


2.  Heat 1 inch of oil in the pan of your choice to between 350 and 375 degrees (medium high on my electric stove.)


3.  Working in batches, remove okra from bowl with a slotted spoon.  Toss in the cornmeal mixture until well coated.  Remove from cornmeal using a slotted spoon and shake off excess.  (Can use a wire strainer for this step if your slotted spoon isn't sufficient.  All slotted spoons are not created equal!)


4.  Fry in batches about 4 minutes each, turning occasionally to brown on all sides.  Drain on layered paper towel.


For tacos:  Fill warm corn tortillas with shredded lettuce or cabbage, fried okra, shredded pepper jack cheese, guacamole, sour cream and salsa.